
WP Zbridge Lite on WordPress.org
The free Lite edition is in the WordPress.org plugin directory:
Step-by-step guide to installing WP Zbridge and connecting Cloudflare Zaraz in minutes.
Setting up server-side tracking shouldn’t require a computer science degree. With WP Zbridge, you can connect your store to Cloudflare Zaraz in just a few clicks.
You can get started immediately with the free open-source Lite package:
WP Zbridge Lite on WordPress.org
The free Lite edition is in the WordPress.org plugin directory:
Install from WordPress
In your WordPress dashboard, go to Plugins > Add New Plugin, search for Zbridge, and click Install Now followed by Activate. Updates then arrive through WordPress like any other plugin.
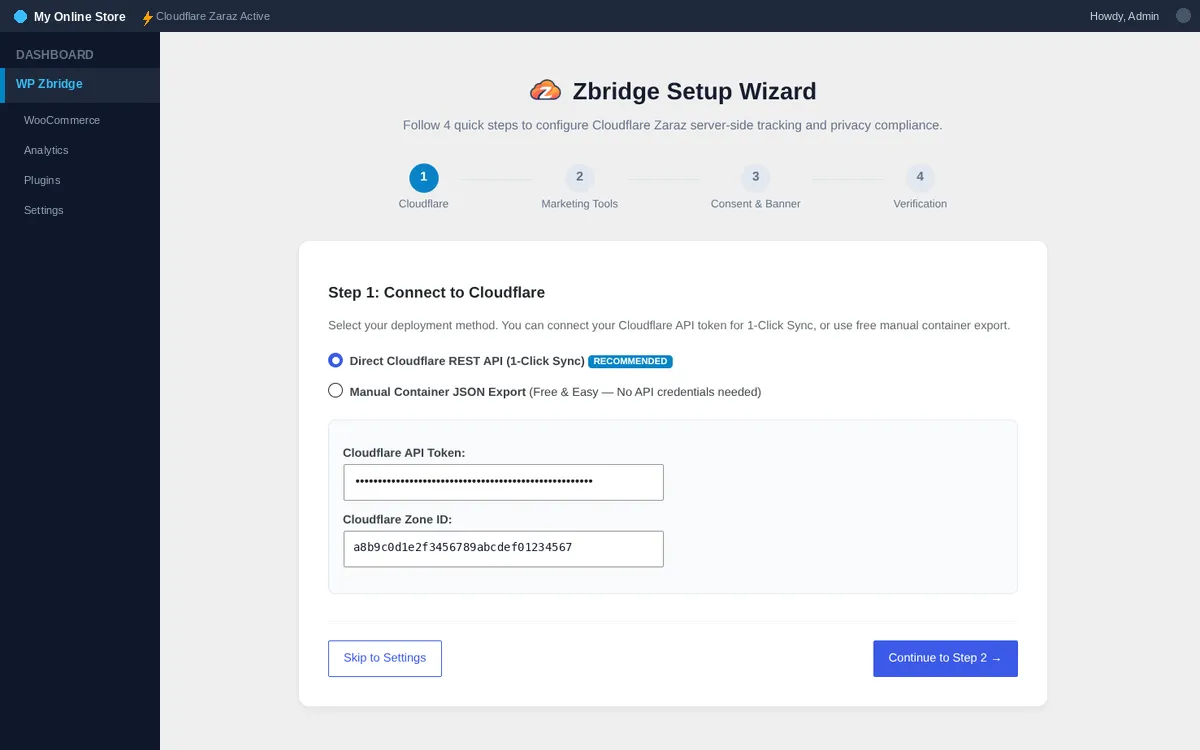
When you activate WP Zbridge for the first time, the 4-Step Setup Wizard launches automatically:
Connect Cloudflare Select Sync to Zaraz (Cloudflare API) (Pro) or Manual Container JSON Export (Lite, no token needed). For the API, enter your API Token and Zone ID and click verify.
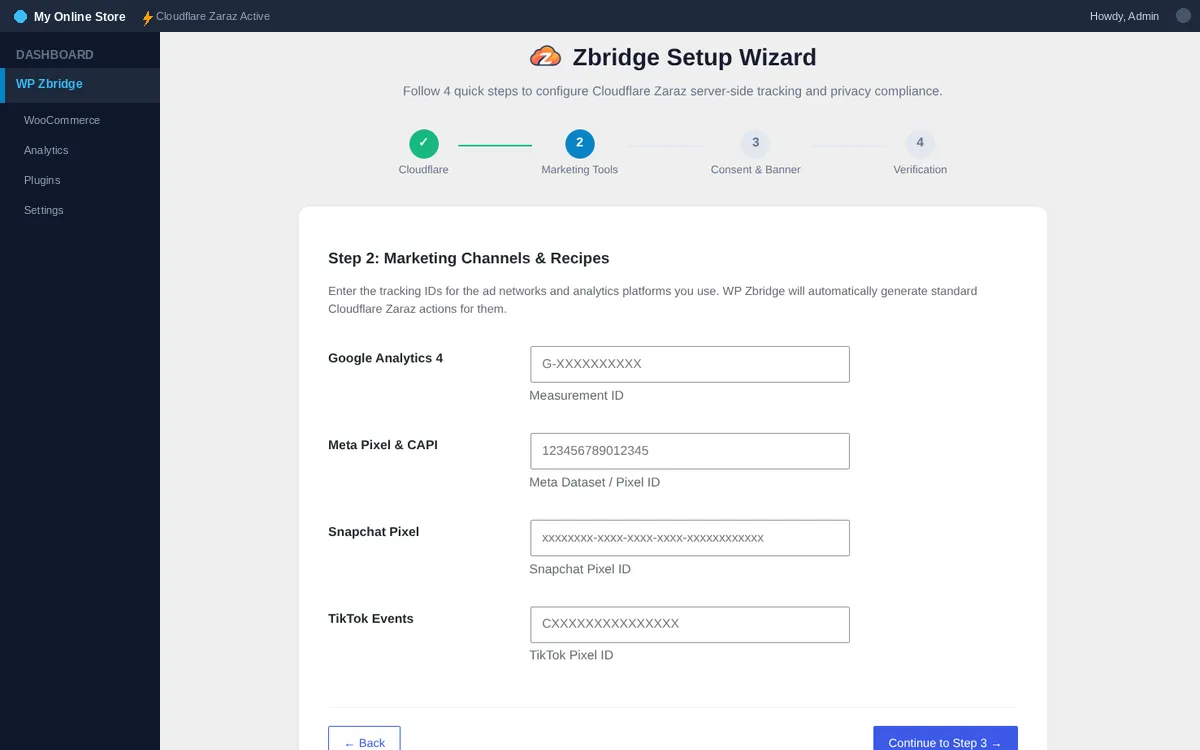
Select Your Marketing Tools & Recipes Enter your tracking credentials (Google Analytics 4 Measurement ID, Meta Pixel ID, TikTok Pixel, Snapchat Pixel, etc.). WP Zbridge prepares the matching Cloudflare Zaraz tools, actions and triggers.
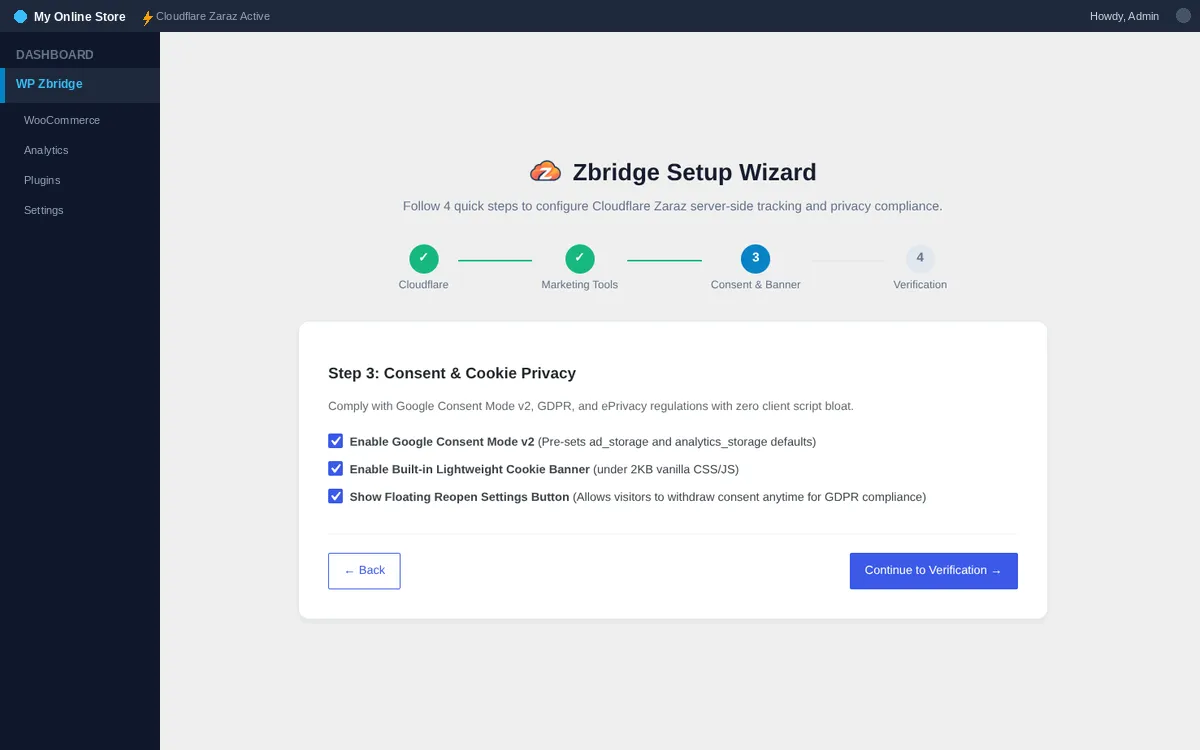
Configure Consent & Cookie Banner Enable Google Consent Mode v2 and the built-in cookie banner, and preview the banner.
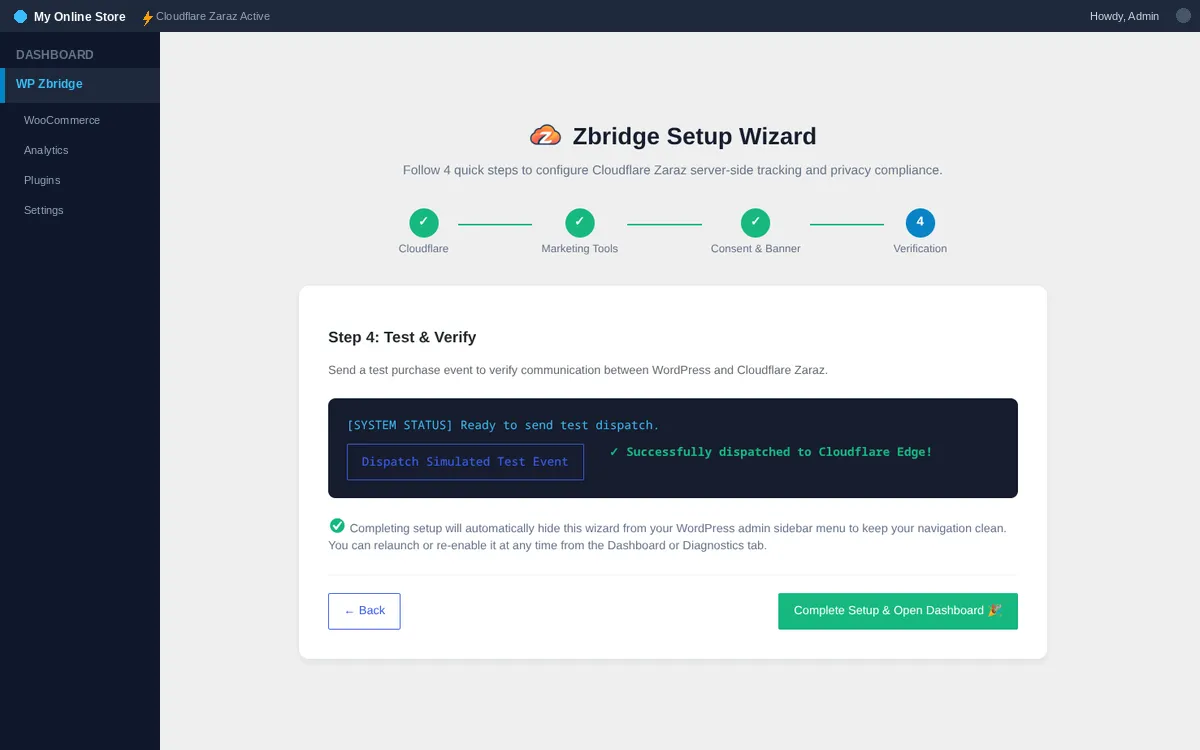
Verify & Complete Setup Send a test event to Cloudflare to confirm the connection. Click Complete Setup & Open Dashboard to finish.
If you purchased WP Zbridge Pro, activate your license key to unlock Sync to Zaraz, the server fallback for purchases, the Pro recipes and plugin updates:
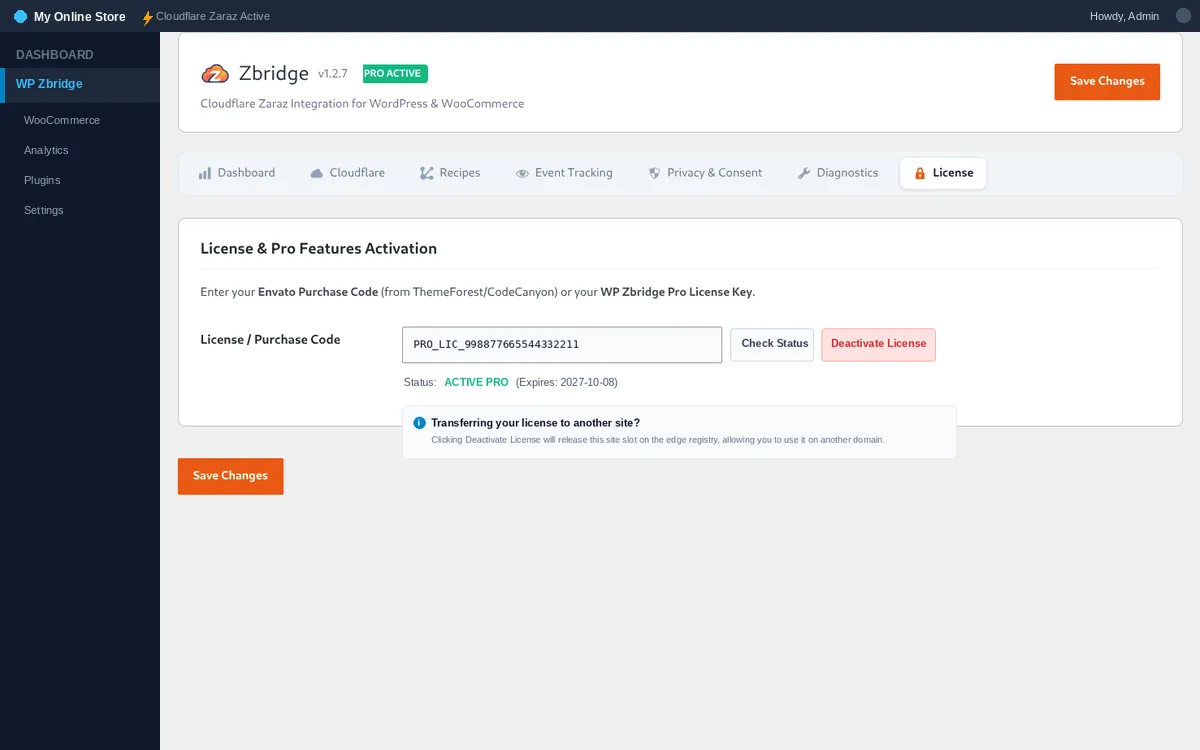
Need to move your license to a new domain, redesign, or staging environment?
If you prefer to configure settings manually:
zbridge-pro.zip and click Activate. (For the free Lite edition, install Zbridge from Plugins > Add New Plugin instead.)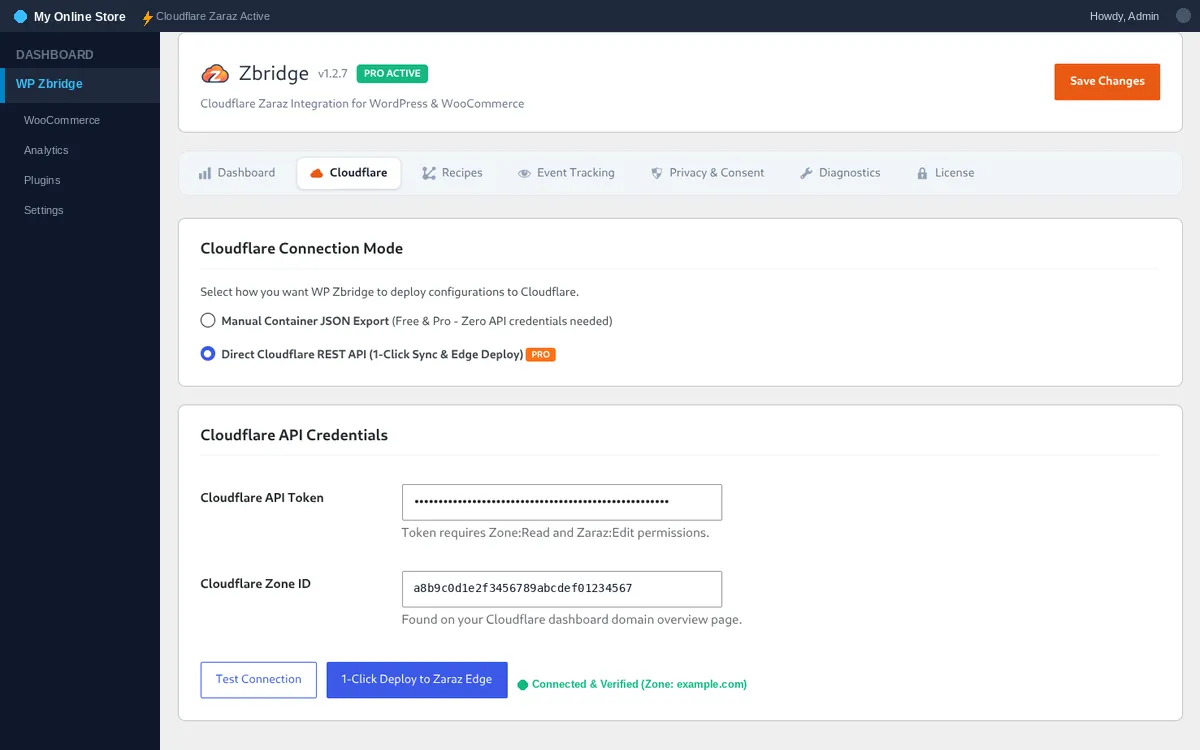
1. Test Edge Handshake & Purchases
Go to WP Zbridge > Diagnostics and click Test Live Edge Handshake or Dispatch Simulated Test Purchase. The result shows whether Cloudflare Zaraz received the event, with the CF-Ray ID.
2. Check Page Speed
Test your store on Google PageSpeed Insights before and after removing your old tracking tags, and compare the third-party JavaScript it reports.